
Hidden Surprises
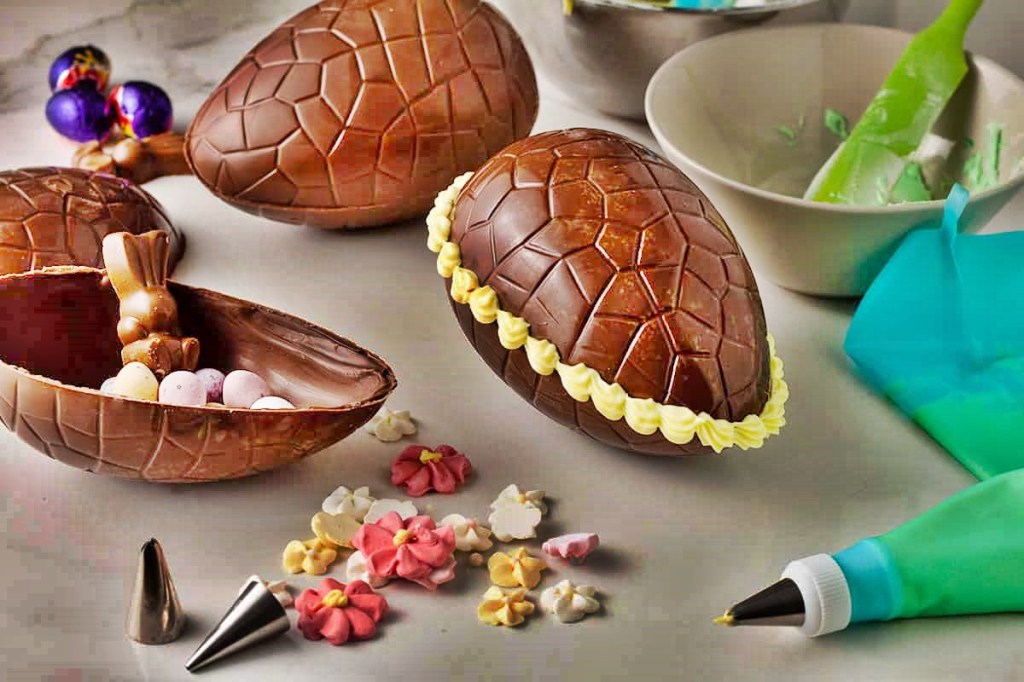
You can fill the eggs with hidden extras. If you love marshmallows, then why not fill the egg with marshmallow cubes. A delicious center of homemade fudge pieces or a few homemade chocolate truffles would also make a great treat too. Or perhaps fill with your favorite mini chocolate bars. Nothing to heavy mind, you don’t want them to break the shells.

Tempering the chocolate
The key to success is to have well-tempered chocolate.
How to Temper chocolate by the seeding method
Step 1
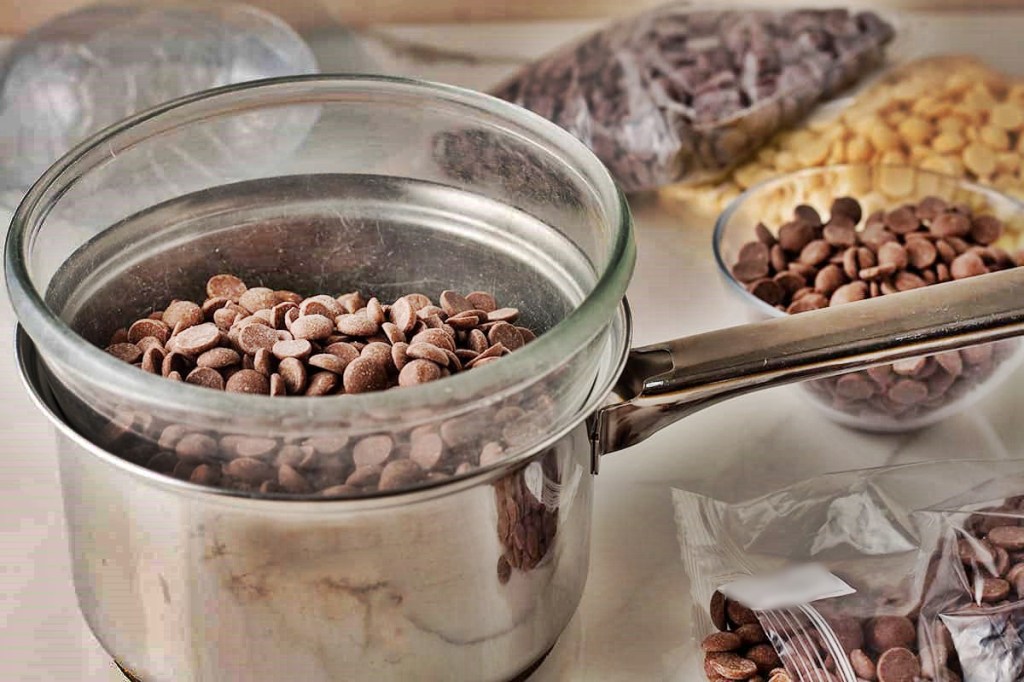
Bring a saucepan with a couple of inches of water to a simmer over a medium low heat. Place a bowl on the pan, making sure its base doesn’t touch the water.
Step 2
Place about three quarters of your finely chopped chocolate into the bowl. Melt the chocolate while stirring constantly. The chocolate should reach a temperature of between 45/48°C (113/118°F) for milk and white chocolate and 53/55°C (127/131°F) for dark chocolate. It will be quite runny at this stage. You can keep it at this temperature for some time should you wish.
Step 3
When you are ready to start working with your chocolate, remove the bowl from the heat and wipe the base of the bowl. Although the bowl was not touching the water, it will be wet from steam. If any moisture gets into the chocolate it will seize, become grainy and cannot be rescued. Getting into the habit of immediately wiping the base is good practice and will help prevent disasters.
Step 4
Add the remaining chocolate. Stir vigorously, breaking the chocolate down with the spatula until all the chocolate has melted.
The chocolate should cool to between 27/28°C (80/82°F) for milk and white chocolate, 28/29°C (82/84°F)for dark chocolate.
Step 5
At this point it will be quite thick and viscous, so needs to be gently rewarmed to a working temperature. Place the bowl back on top of the saucepan of water and heat very gently whilst stirring to 29/30°C (84-86°F) for milk and white chocolate, 31/32°C (87/89°F) for dark chocolate. There may be enough heat left in the water without returning the pan to the heat. Take care not to overheat the chocolate at this point.
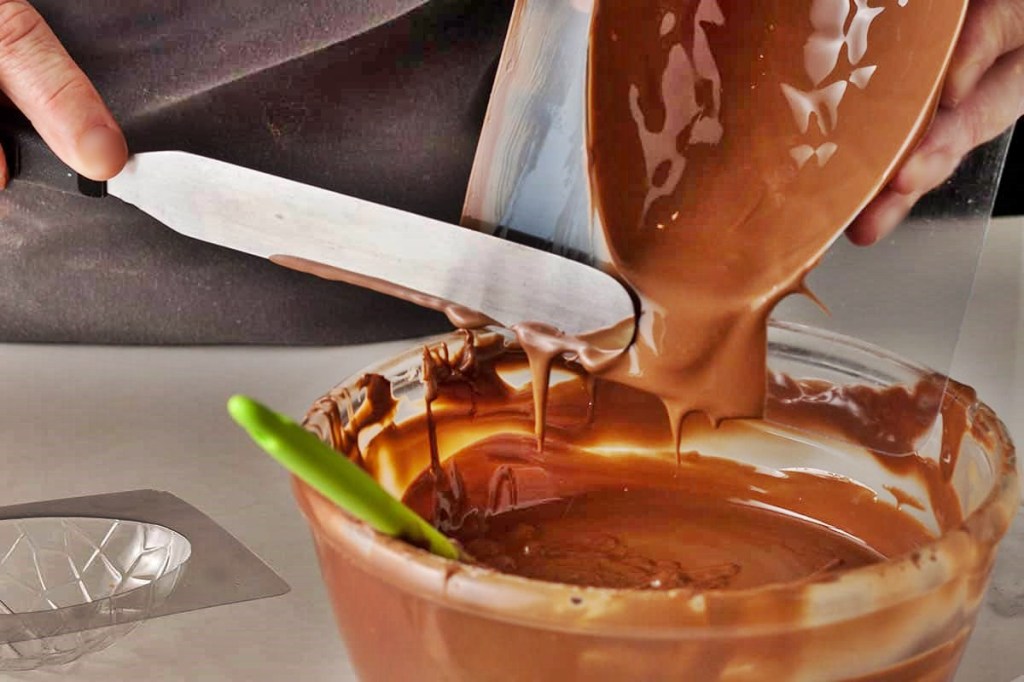
Test the chocolate to check it is tempered correctly by drizzling a small amount on a palette knife. It should set hard within 5 minutes and have a nice sheen.
The poorly tempered chocolate shown here on the left palette knife is dull and soft. The tempered chocolate on the right hand palette knife is shiny and set hard.
Hints and tips when tempering chocolate
- While using a thermometer is not essential, it helps to take the guess work out of the process. I have used a Thermapen thermometer for several years now and have found it very reliable.
- Before you start, make sure all of your equipment is completely clean and dry. As mentioned above, water is the enemy of chocolate. Make sure your hands are dry too and do not be tempted to lick your fingers while you work.
- It is always easier to temper and work more chocolate than you need. The reason being that it is easier to control the temperature of the chocolate when you have a larger quantity. A small amount can overheat very quickly. When filling moulds and dipping truffles it is far easier if you’ve got more than enough. When you have to start scraping around for every last bit of chocolate things can quite literally get messy and can spoil the end result.
- NEVER hurry the melting process. You can even leave the chocolate melted for several hours before beginning the cooling process. Although you might not want to leave it that long, it is essential that you let the chocolate melt slowly.
- Place the chocolate in a bowl over a pan of hot water, making sure the water is not touching the base of the bowl as this may cause the chocolate to become too hot.
- The type of bowl you use will affect the process. I generally use metal bowls. They conduct the heat very well but get very hot very quickly so if you use one you will need to take care not to let the chocolate overheat. I remove the saucepan pan from the heat source during the melting process and only return it to the heat if absolutely necessary. On the upside, when it comes to the cooling part of the process the bowl does not retain its heat and can help speed up the cooling.
- Glass bowls are less prone to quick fluctuations of temperature, so are less likely to overheat the chocolate. On the downside, they retain the heat for longer so the cooling process is slower.
- While you can leave the chocolate in its melted state for some time, once it has been tempered it sets much more quickly than chocolate that has simply been melted. Get everything you need together before you start to cool the chocolate.
- If the chocolate starts to harden before you have finished working with it, quickly pop it back onto the heat to very slightly warm through until workable again. You will be fine doing this once or possibly twice but do try to work quickly and efficiently for best results.
- Because chocolate is affected by both heat and moisture try to work in cool dry conditions. If Your kitchen is very hot and steamy it will be very hard to get good results. Cold damp days can also be a problem.
Can I reheat tempered chocolate?
If the chocolate cools too much and becomes too thick to work with you do not need to completely restart the tempering process from the beginning.
As it thickens you can warm it again either by placing it back over the pan of hot water briefly or by adding more warm untempered melted chocolate. (Your tempered chocolate will act as a seed to temper the newly added untempered chocolate).
Just be careful that you don’t overheat the chocolate or the temper will be lost.
Can I use a microwave to temper chocolate?
If I’m melting chocolate that doesn’t need to be tempered for example to go into a cake, or to make a cheesecake or mousse, I use the microwave because it is quicker and more convenient, although that does mean you still need to take care not to overheat the chocolate.
For any recipe where you need a good finish to the chocolate, I strongly recommend against using the microwave and melt on a low heat as above.
Where to buy Easter egg moulds
Easter egg moulds are easily sourced from large craft stores, and some supermarkets, though do shop around as the price can vary enormously for the exact same product.
You will also find them on line, I purchased mine from AMAZON . eggs ARE slightly easier to remove from silicone moulds especially if the temper isn’t perfect.
Chocolate will take on the surface from which it is set. Wash the moulds in warm soapy water and dry well (Water is the arch-enemy of chocolate). Before using polish the inside of the moulds with a piece of kitchen paper or lint-free cloth (teashirt material is perfect) to ensure a nice shine once the chocolate is turned out.
What chocolate is the best for making easter eggs?
The chocolate that we use to make chocolates is known as couverture and contains extra cocoa butter and a higher percentage of cocoa solids. It melts evenly, pours and spreads more readily and will give a more even coating than other chocolate.
Couverture must be at least 31%
If you are going to cook with chocolate regularly it is better to buy larger blocks or bags of chocolate chips sold for catering purposes as it will work out a lot cheaper in the long run.
Step two – Prepare the Moulds
Ensure the Easter egg mould is thoroughly clean and dry and polish the inside with a piece of kitchen roll or lint-free cloth. I do this while the chocolate is being melted before adding the seed chocolate so that the moulds are ready by the time the chocolate is tempered.
Step three – Coat the insides of the moulds with chocolate
Spoon enough chocolate into the mould to fill by about a one-third then tilt the mould until the chocolate has coated all the inside of the mould. Then hold over the bowl of chocolate and tip out excess.
Next, use a palette knife to remove the chocolate from the surrounds of the mould. This will neaten the edges of the shells making it easier to join the two halves of the egg together later.
Place the coated mould upside down on the work surface of a baking tray for about 5 minutes. Turn upright and allow the chocolate to set.
Repeat the process of filling with more chocolate and removing the excess chocolate.
Step four – Unmoulding the Easter Eggs Set aside to firm up.
Set the chocolate shells aside and allow the chocolate to set for at least an hour, avoid putting them in the fridge.
Once the chocolate has completely set it will have shrunk very slightly. loosen the edges of the chocolate buy gently pulling at the moulds. Then turn over and carefully press the chocolate shells out.
Step five – Finishing the eggs
Heat a baking tray in the oven or a heavy based frying pan on the hob until hot.
Gently place the matching eggshells on the hot surface for a second or two so that it melts the edge of the chocolate shell a little. At this point you can place a few additional chocolates or sweets inside one egg half before carefully joining up the two halves, holding the egg together whilst the melted chocolate starts to sets and ‘glue’ the two pieces together.
It is a good idea to wear disposable gloves to avoid getting fingerprints on the finished egg.
Leave the eggs plain or pipe tiny shells of royal icing along the join. Decorate as desired.
Equipment
- Easter egg moulds
- palettte knife
Ingredients
- 600 g Chocolate
- Selection of your preferred confectionery (optional)
- Ingredients to decorate (optional)
Instructions
- Ensure the moulds are scrupulously clean and dry and polish the insides with a piece of kitchen paper or cloth.
- Place about two thirds – 400g (14oz) chocolate into a heatproof bowl. Suspend the bowl over a pan containing some water. Heat gently stirring until the chocolate thas melted and reaches between 45/48°C (113/118°F) for milk and white chocolate and 53/55°C (127/131°F) for dark chocolate.
- Cool the chocolate. Remove the bowl from the pan and wipe the bottom of the bowl dry. Add the remaining 200g (7oz) chocolate. Stir the chocolate constantly until the additional chocolate has melted and cooled down to 27/28°C (80/82°F) for milk and white chocolate, 28/29°C (82/84°F)for dark chocolate.
- Return the bowl of chocolate to the pan. Continue to stir and gently reheat to 29/30°C (84-86°F) for milk and white chocolate, 31/32°C (87/89°F) for dark chocolate. The chocolate is now tempered. Remove the bowl from the heat wiping the bowl dry again
- Spoon enough chocolate into the mould to fill by about a one-third then tilt the mould until the chocolate has coated all the inside of the mould. Then hold over the bowl of chocolate and tip out excess. Next, use a palette knife to remove the chocolate from the surrounds of the mould. This will neaten the edges of the shells making it easier to join the two halves of the egg together later.
- Place the coated mould upside down on the work surface of a baking tray for about 5 minutes. Turn upright and allow the chocolate to set. Repeat the process of filling with more chocolate and removing the excess chocolate.
- Set the chocolate shells aside and allow the chocolate to set for at least an hour, avoid putting them in the fridge. Once the chocolate has completely set it will have shrunk very slightly. loosen the edges of the chocolate buy gently pulling at the moulds. Then turn over and carefully press the chocolate shells out.
- Heat a baking tray in the oven or a heavy based frying pan on the hob until hot.Gently place the matching egg shell on the hot surface for a second or two so that it melts the edge of the chocolate shell a little. At this point you can place a few additional chocolates or sweets inside one egg half before carefully joining up the two halves, holding the egg together whilst the melted chocolate starts to sets and ‘glue’ the two pieces together.
- Leave the eggs plain or pipe tiny shells of royal icing along the join. Decorate as desired.
